I'm going to be occasionally posting some "how to" type articles that explain how I've made some of the items in my shop and/or the design thinking behind it. This is the first. Hope you enjoy it!
-Alia
---------
How to Make a Refillable Leather Journal / Sketchbook (with a pen closure)!
As someone who sketches out my ideas a lot (and writes down random things so I don't forget) I find that I go through a ton of sketchbooks and journals. So while I've come across some really amazing leather journals I've never bought one myself because I know the ones with the beautifully bound pages tend to be pricey, plus (and this is the bigger issue) I know I'll fill up the pages quickly and feel like I've wasted it when I'm done. The generic store bought sketchbooks can also be kind of expensive and even with those-- what do you do with all those random journals you've used up and accumulated? If you're filling pages with masterpieces then it makes sense to hang onto them, but if you're like me and need a place to just get your ideas down or work out some design issues then you need something more functional and economical.
So I recently decided to design my own sketchbook. To create this sketchbook I needed to solve 3 issues-- I needed it to be durable (since I would be reusing it), I needed a way to remove and refill the pages easily, and I needed it to be small enough that I could always carry it around with me.
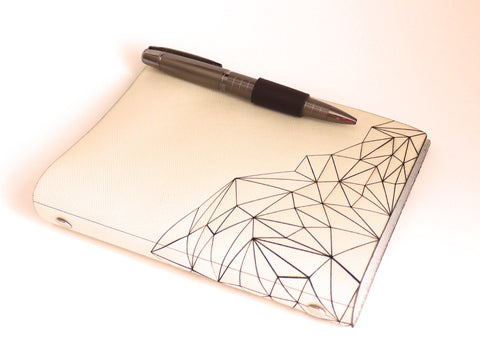
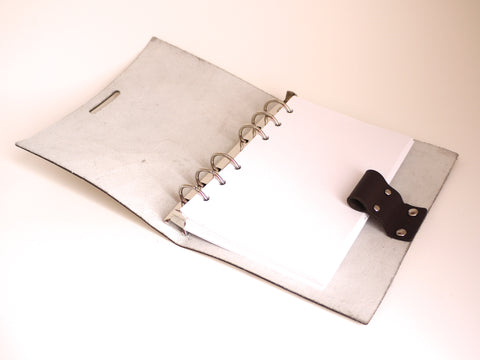
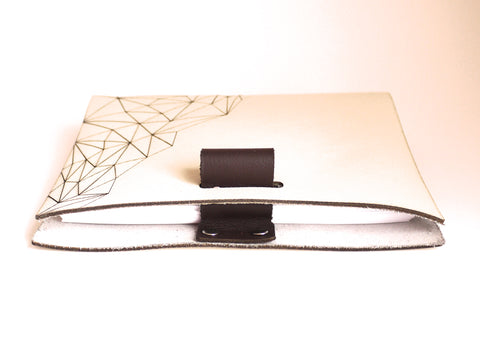
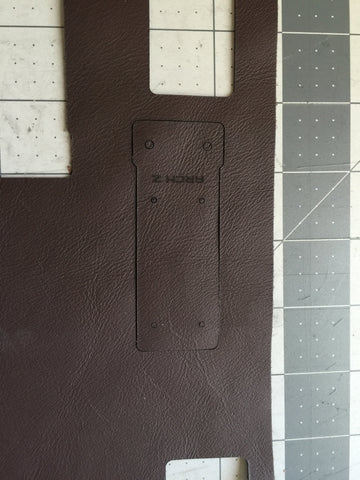
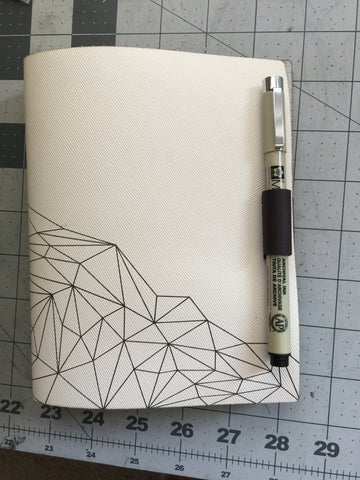
The design I'm showing here is the one available in my shop - The Geometric Mountain Sketchbook in Creme Leather with a Pen Closure - which has a geometric engraving and a special pen closure system. If you're going to make a leather journal yourself you don't need to make it look exactly like this and can add whatever design you like, or none at all. Also I laser cut my design and will mention that in the directions but the design is simple enough that you can cut this from leather by hand.
- Leather (at least 11.75 inches x 6.75 inches or 294mm x 172mm). Preferably semi-firm and 4-6 ounces in thickness. Available at Tandy Leather or Springfield Leather and other Leather/Craft stores.
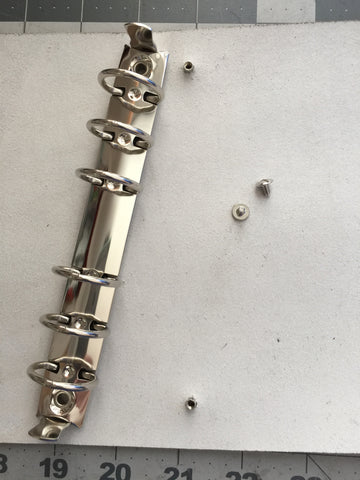
- Small Metal Binder Spine. 3 or 6 ring Binder Spines are available at Tandy Leather or Springfield Leather and other Leather/Craft stores. These should be under 7" in length for this design. If longer then adjust the size of the rectangle to compensate.
- A rotary cutter and/or utility knife. Olfa and Fiskar brands work well.
- A straight edge. Find at any arts and crafts stores. Metal ones work best.
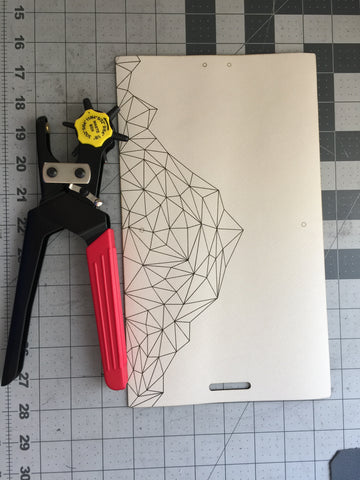
- Rotary Leather Punch. Any leather or craft store will carry this.
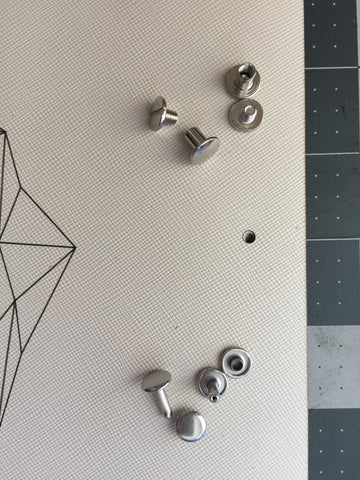
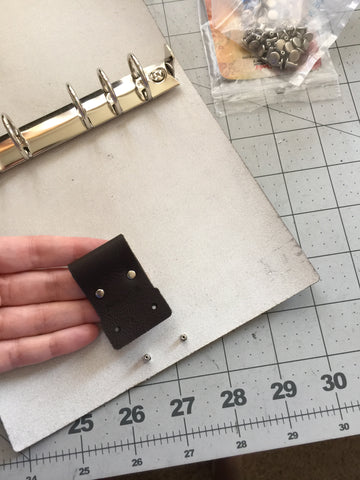
- Rivets and Chicago Screws (or similar leather screws). Available at Tandy Leather or Springfield Leather and other Leather/Craft stores.
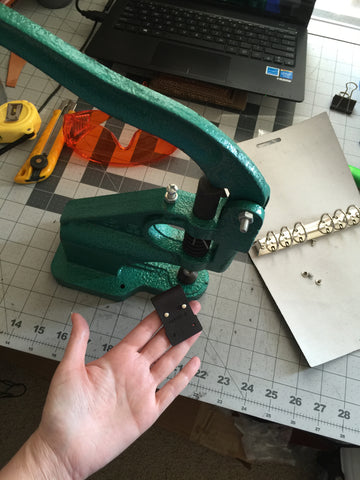
- Rivet Setter. Available at Tandy Leather or Springfield Leather and other Leather/Craft stores.
- Optional: Laser Cutter (or access to one)
- Optional: Thin pliable leather 2-3 ounce thickness for pen closure
Step 1: Pick Your Leather
Since this leather won't be wrapping a notebook but will need to have a stiffness of it's own, you'll want to pick leathers that are semi-firm. You don't want it so stiff that it's hard to bend but you also don't want it so soft that it doesn't feel like it will hold up on it's own. The leather I chose is stiff enough that it can literally stand on it's own like a book, but pliable enough that I was able to easily bend it to form the shape of my sketchbook. The leather I'm using is an embossed leather but you can use a veg tan leather since that's much easier to find and are usually somewhat firm. They are also durable which is important for a journal/sketchbook you will be refilling and using for a long time.
Step 2: Cut Your Leather
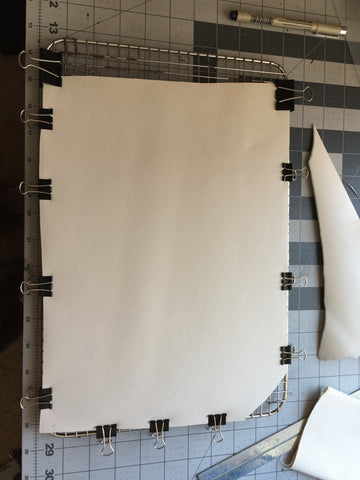
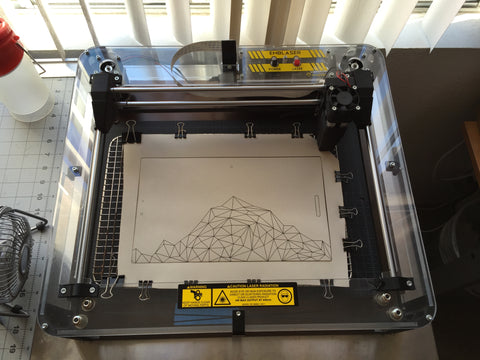
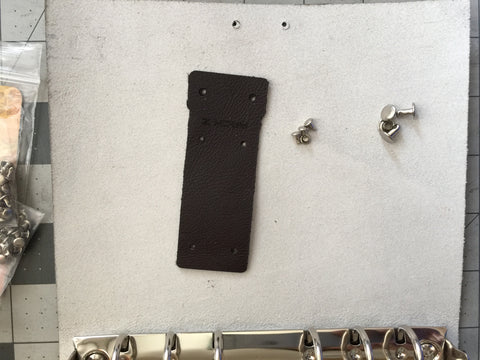
So as mentioned I engraved and cut my design using a laser cutter (a 3 watt Emblaser Laser Cutter that I highly recommend if you can afford it). The pdf file I'm attaching for the template can be used as a basis for a laser cut design but it can also be used to cut your shape out of the leather. Or if you prefer just cut a rectangle that is 11.75 inches x 6.75 inches (294mm x 172mm). Rotary cutters and utility knives along with a straight edge work well for this. Once you cut this you'll want to mark where the spine will be as well as the 2 holes for the rivets or Chicago Screws (which attach the spine and the leather cover together). You'll need your metal binder spine in order to do this but you can also use my template as a guide. It's best to do this on the inside of the leather since the marks will be covered up with the metal spine.

Once you've marked exactly where the spine will go you'll want to bend the leather so it has more of a book shape. I can't do this with embossed leathers but with veg tan leathers you can wet the edge you are bending to help it bend and keep it's form if you find it's necessary.
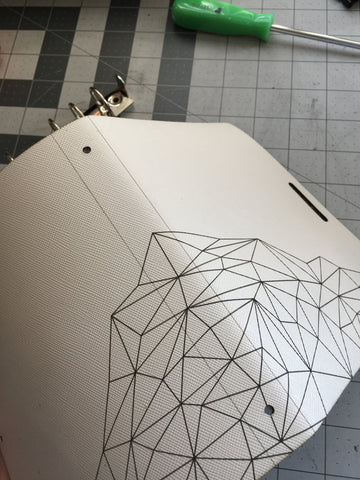
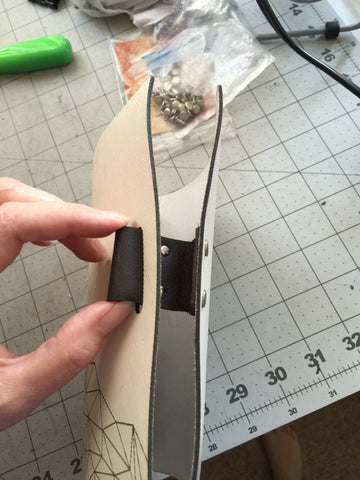
After you have everything marked out you'll want to punch out the holes for where the rivets or screws will be going. You'll use a rotary leather punch for that. You can also buy individual punches that you strike with a hammer but I've found those to be more of a hassle to deal with. You'll also want to create a long hole for where the pen closure strap comes through if you're adding that.
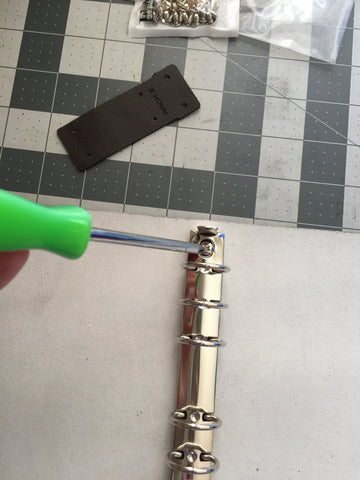
Step 3: Attach Your Metal Binder Spine to Your Leather
There's a couple options for how to attach the spine to the leather. You can use Large size metal rivets (the large ones have a long enough shaft to go through the spine and the leather). To do that you just snap them together, get your rivet setter, and pound away with a hammer. Or you can use Chicago Screws (or other leather screws) which simply screw together. Each option works and I continue to use both but each has their own issues. With Rivets I seem to be incapable of striking a hammer on the rivet setters at a 90 degree angle so they always go in a little crooked (at least until I got a rivet press which is awesome btw). But rivets are cheaper and do the job just fine. Chicago Screws are generally more expensive but they are really easy to install, and they can be removed (and they provide a much stronger connection). Additionally if you don't want them to come lose you can add a little Loctite before screwing them in and they are very secure. Unfortunately Chicago Screws sometimes have too wide a shaft for the holes in some of these metal binder spines. I was able to find some similar leather screws that worked for me but you'll have to find whatever works with the spine that you've purchased.
Step 4: Admire Your Work or Keep Going
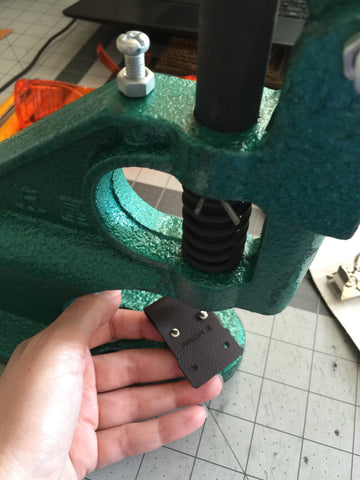
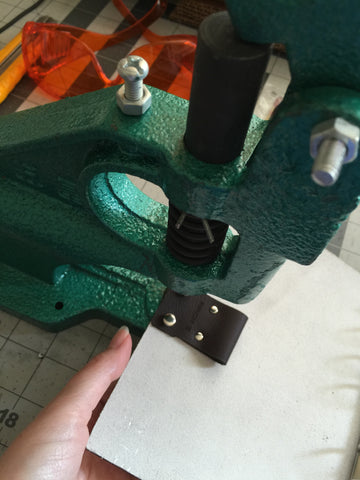
If you decided to keep your design simple you may actually be done at this point. But if you wanted to add the pen closure I designed you can do that now. You'll need two types of rivets-- size small rivets for attaching the strap to the leather cover, and mini rivets for creating the pen loop. (FYI I've only been able to find the mini size rivets at Tandy Leather.)
As mentioned I have a rivet press that I use for all my leather work now which has made applying rivets almost a joy. If you can't afford one and you're good with a hammer then just use a rubber mallet and carefully pound on the heads a few times.
Step 5: Add Paper
This last part is really up to you. If you're a paper snob (it's okay-- I used to be one) you can get your favorite paper and have a print shop or Staples cut it down to size and then punch the appropriate holes in it. If you're less picky you can probably find some pre-cut 4x6 paper that will work just fine (and of course get the holes punched). Whatever you choose remember that the great thing about this refillable journal is your not stuck with one kind of paper or a finite amount of it. Go crazy.