This brief tutorial will show how to quickly make a leather water bottle holder with a few pieces of leather, some rivets, and a couple metal loops for the shoulder strap. 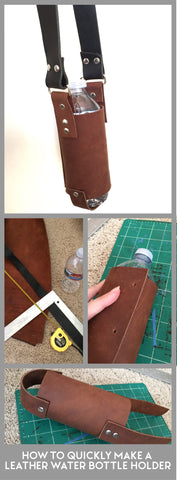 I made this with some rustic leather I had been meaning to use, and a long (but irregular) strap that came with an order of scrap leather. The end result is not the prettiest (and not something I would sell) but it gets the job done-- it allows me to carry my water on walks at the beach or hikes while keeping my hands free.
[For a nicer water bottle holder I would recommend using good quality veg tan leather for the body and a pre-cut veg tan strap in the 50" range for cross body straps. I also recommend using smaller loops or D-rings so that the straps don't have to be so wide.]
I've designed this for a standard water bottle but you can easily adapt this to hold any insulated water bottles by adjusting the size of the leather for the main body. You could adapt it to hang from bicycle handlebars as well if you prefer that.
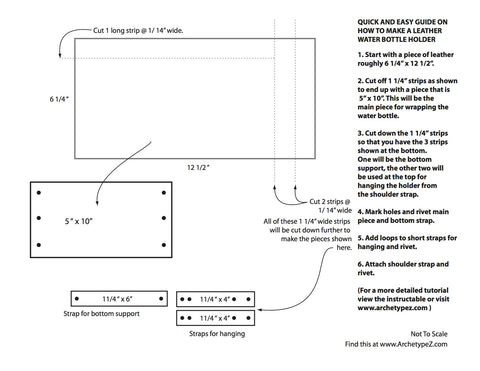
Here is the GUIDE showing the 4 main parts you will be working with. Note: The guide doesn't include the shoulder strap.
Tools And Materials
With everything below this can probably be completed in 1-2 hours.
Here are the tools and materials you will need to complete this:
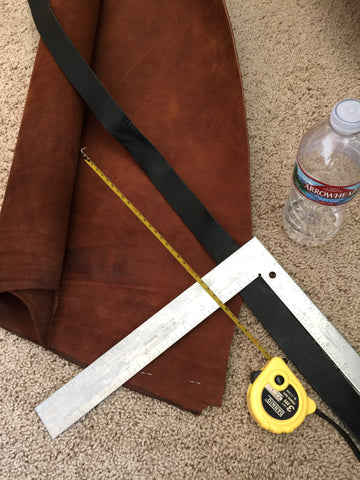
- A water bottle (helpful when marking holes in the right places for rivets)
- A piece of leather roughly 6 1/4" x 12 1/2" with a thickness of about 4-5 ounces.
- 1 leather strap 50"+ (This is the shoulder strap. If it's not adjustable you'll want to make sure the length is correct for your height and how you will be wearing it).
- Metal Rivets. (I recommend Tandy Leather's medium rivets or similar)
- Tools for applying rivets. (Any leather supply shop has these.)
- 2 x metal loops that match the width of the straps you will be using. (My loops were 1 1/2" but for something small like a water bottle a 3/4" loop and straps of matching width should do. Country Brook Design offers an assortment of sizes.)
- Leather hole punch. (Any leather supply shop has these as individual tools of different hole sizes or as a rotary punch.)
- Leather scissors or utility knife or rotary cutter. (These can all be bought from Amazon.)
- Ruler or Tape Measure.
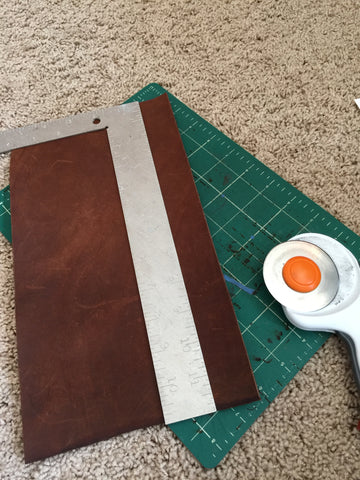
Cut Your Leather Into 4 Pieces
The first step is to start cutting down your leather. You'll end up with 4 pieces for the main body of the water bottle holder (plus some extra straps):
5" x 10" for the portion that wraps the bottle.
1 1/4" x 6" strap for the bottom support.
Two 1 1/4" x 4" straps for hanging from the top. (If using narrower loops and shoulder strap you can make these more narrow)
Don't forget to also have some sort of long strap for the shoulder strap. But you won't need this until the end.
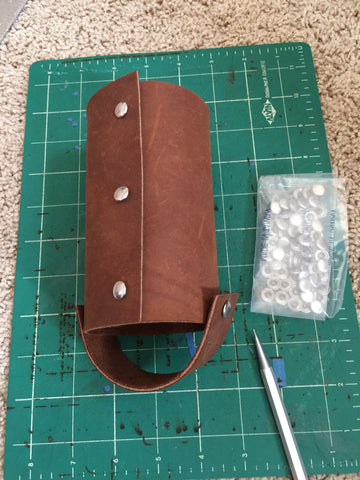
Wrap and Rivet
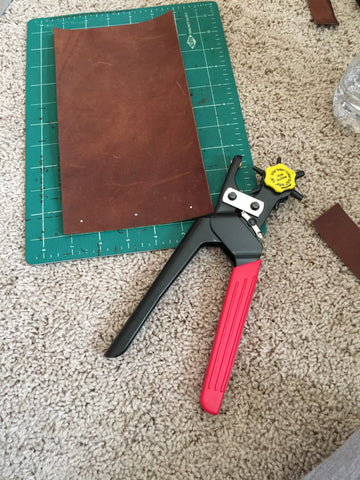
Wrap the larger cut piece around the water bottle. It should overlap enough to drive the rivets through two layers (see photo). Mark where you would like to place the rivets*, then punch the holes and place the rivets through the holes. [Note that I'm not actually applying the rivets yet but just using them to hold the material in place. I've found it's easier to wait until the end to rivet everything at once.]
Next place the support piece that goes underneath the bottle and mark and punch the holes for that. Again put the rivets through to hold the strap in place.
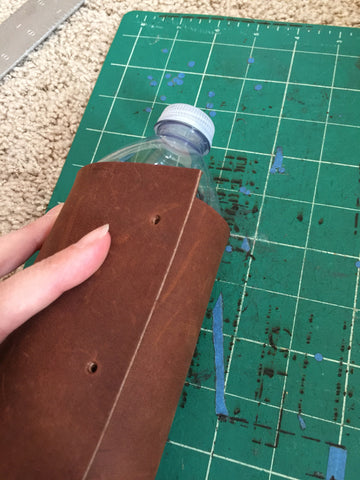
*Tip: Mark the outer layer first and punch those holes. Then again wrapping the bottle mark the inside layer through those holes by taking something sharp like an awl and poking it through the already punched holes to the layer of leather behind it. This tells you where to punch the holes and insures that the holes line up. You can apply this method to all the rivet holes.
Add The Strap Loops and Finish Riveting
Your loops and strap sizes should match. The straps really don't need to be very wide for this but I had loops from Country Brook Design that were 1 1/2" wide and didn't want to buy new ones so I just used those. But for the scale of this project, straps and corresponding loops of 3/4" wide would probably work fine (and look better).
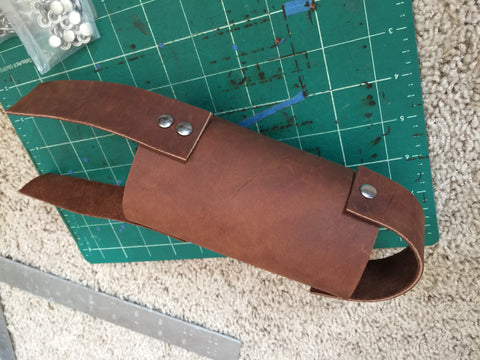
Make sure to put the leather through the loop first and then rivet. The shoulder strap was pretty thick so I used two rivets there but for narrower and thinner straps it's not necessary.

[ A Note On Riveting: I've previously used the standard leather rivet tools that you apply with a hammer, but they are difficult to use and you waste a lot of rivets with them, so I now use a hand press. You can find these on eBay or leather supply shops like The Buckle Guy.]
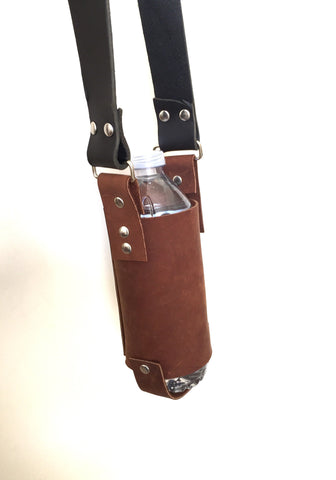
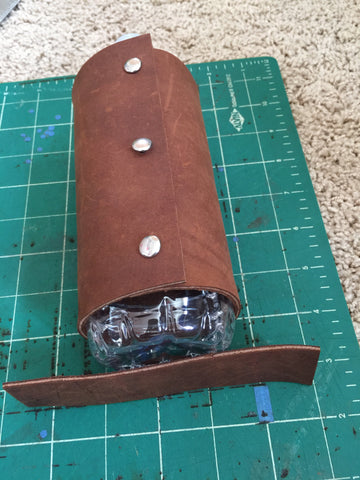
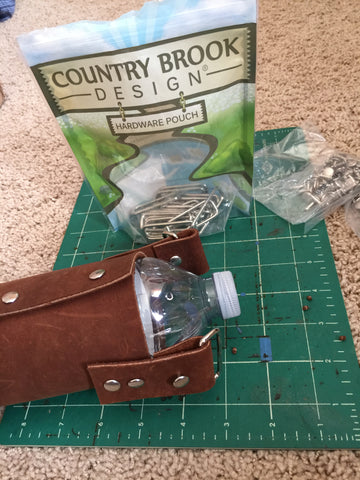
Your Done!
After all your riveting is done your easy, no-sew, Leather Water Bottle Holder should be complete!